OpenAI Completion
Follow these steps to set up an Agent with OpenAI completion.
Step 1: Create an OpenAI Account
- Visit the OpenAI Signup Page and register an account.
Step 2: Generate an OpenAI API Key
- Go to the OpenAI Dashboard.
- Navigate to the API Keys Section.
- Click Create new secret key.
- Provide a name tag, select a project, and set security permissions.
- Copy and store your API key safely, as it will not be shown again.
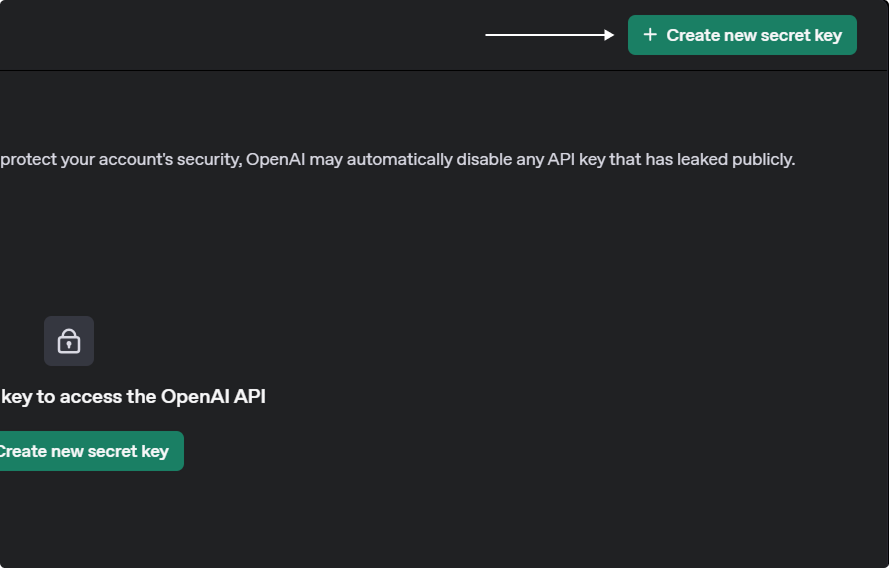
Once you’ve set up an OpenAI assistant, you can integrate it into your XR project.
Step 3: Integrate Your OpenAI Agent with XR Creator Studio
1. Add an AI Agent Element in XR Creator
- Open your project in the XR Editor.
- In the Elements Menu, select AI Agent.
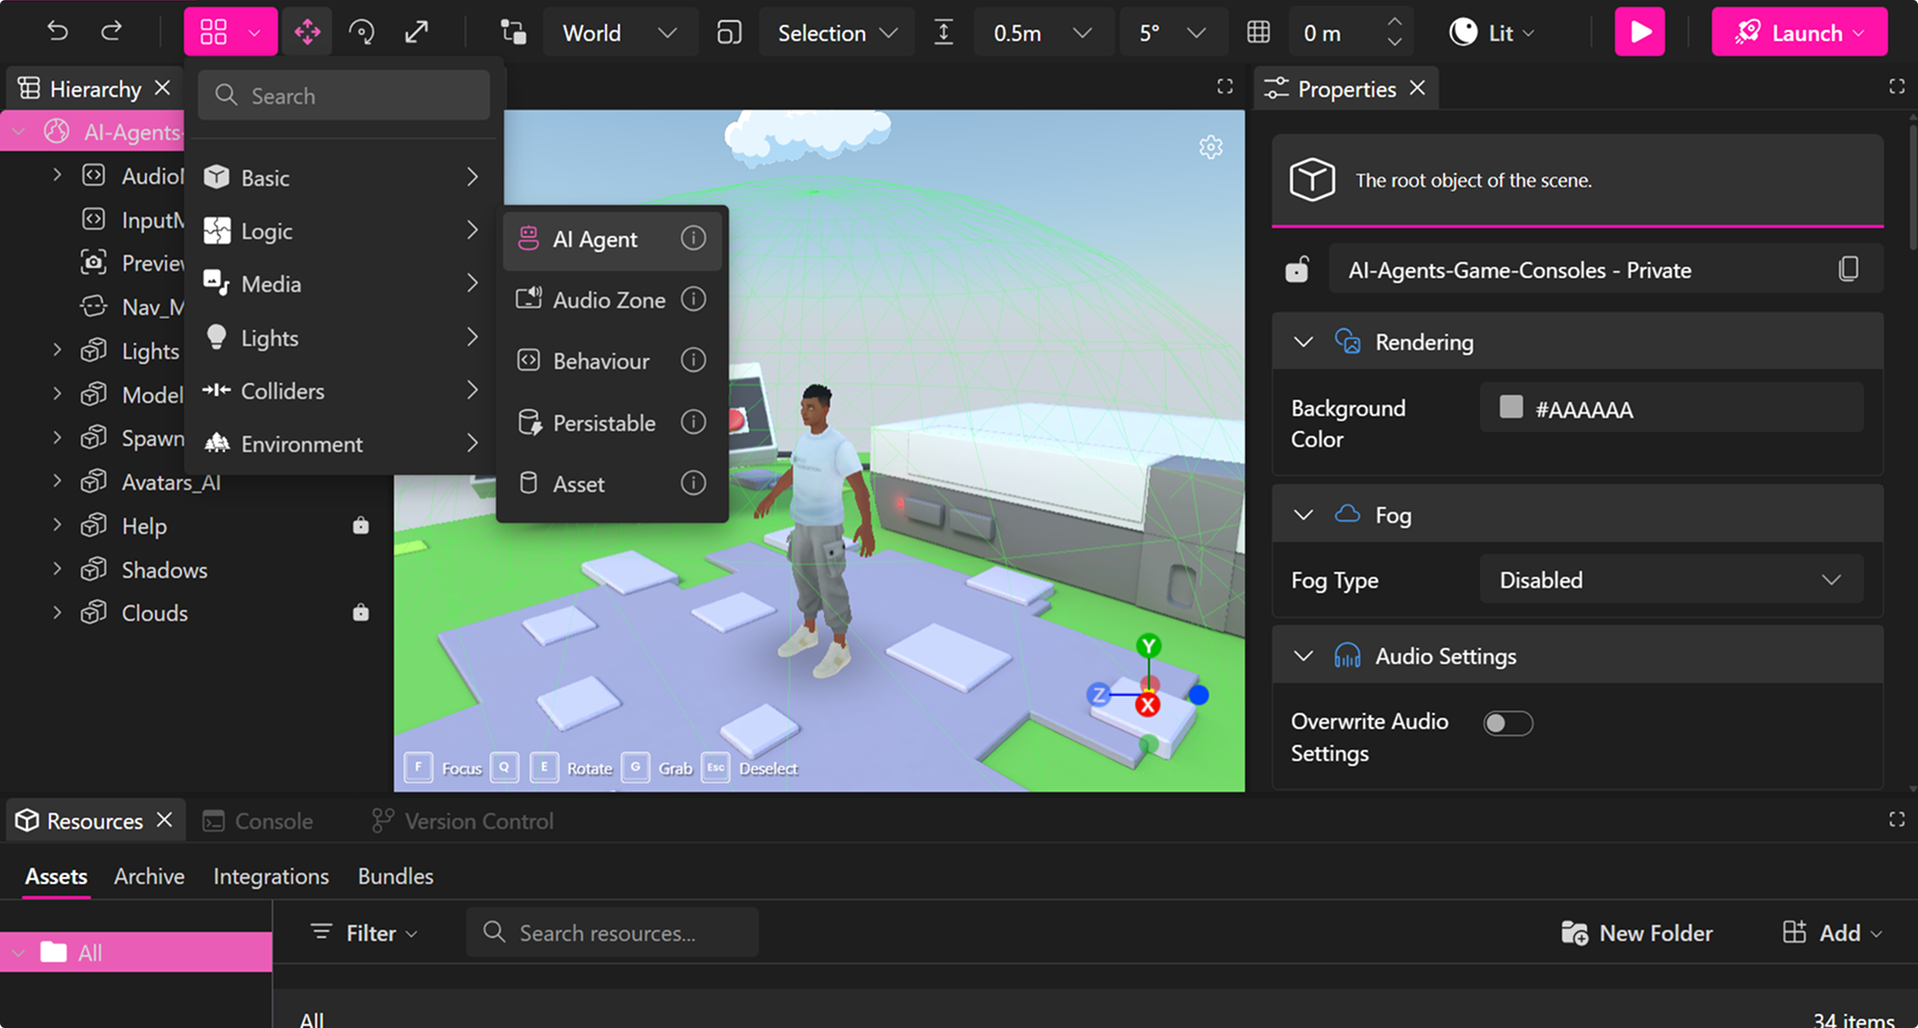
2. Configure AI Agent Properties
In the Properties Panel, you can set parameters to connect your assistant.
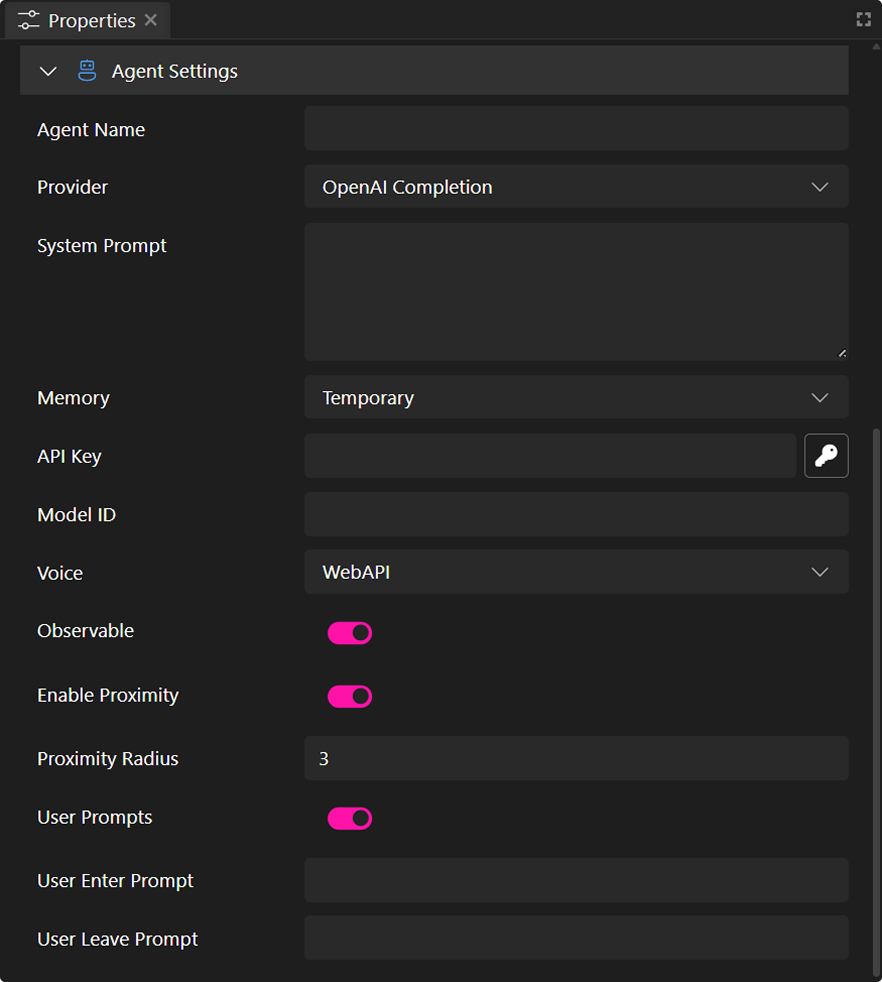
- Agent Name: This name will appear in the chat interface.
- Provider: Select the AI service, in this case, OpenAI Completion.
- System Prompt: Instructions defining the AI's role, personality, or constraints (e.g., "You are a helpful assistant specializing in company products."). Max length ~4000 characters. This field is optional.
- Memory: Defines the type of memory your completion agent can use. By default, it operates with temporary volatile memory, meaning the agent retains chat history only during your session. Once you leave, the memory is erased. Alternatively, you can enable persistable memory, allowing the agent to maintain chat history across sessions.
- API Key: Enter your secret API key securely.
- Model Name: (Required for OpenAI Completion provider) The specific OpenAI model to use (e.g., gpt-3.5-turbo, gpt-4, etc).
- Voice Options:
- OpenAI – Uses OpenAI’s voice generation.
- WebAPI – Uses browser-based text-to-speech (varies by browser).
- Silent – The agent will only communicate via text chat.
- Emit Events: Enable this to trigger in-world scripting events.
- Observable (Emit Events): Enable this option to trigger in-world scripting events. These are especially useful when working with our Scripting API. See more in the AI Agent Event System guide.
- Enable Proximity: The agent can detect when a user enters or exits a defined range.
- Proximity Radius: Sets the distance (in meters/units) around the agent where proximity events (like user-enter or user-leave) are triggered.
- User Prompts: Enable this to allow the agent to show custom messages when users enter or leave its proximity.
- User Enter Prompt: The message the agent will say or display when a user enters the defined proximity radius.
- User Leave Prompt: The message the agent will say or display when a user exits the proximity radius.
- User Prompts: Enable this to allow the agent to show custom messages when users enter or leave its proximity.
- Proximity Radius: Sets the distance (in meters/units) around the agent where proximity events (like user-enter or user-leave) are triggered.
Only the OpenAI API Key and the Model ID are not optional. Once your properties are set up, you can publish your project and have a fully functional Agent.
Enable Persistable Memory for Completion Agents
You can enable persistable memory for your agent, allowing it to retain chat history across conversations.
To do this, select a Persistable element from the elements dropdown, which will automatically add it to the hierarchy panel.
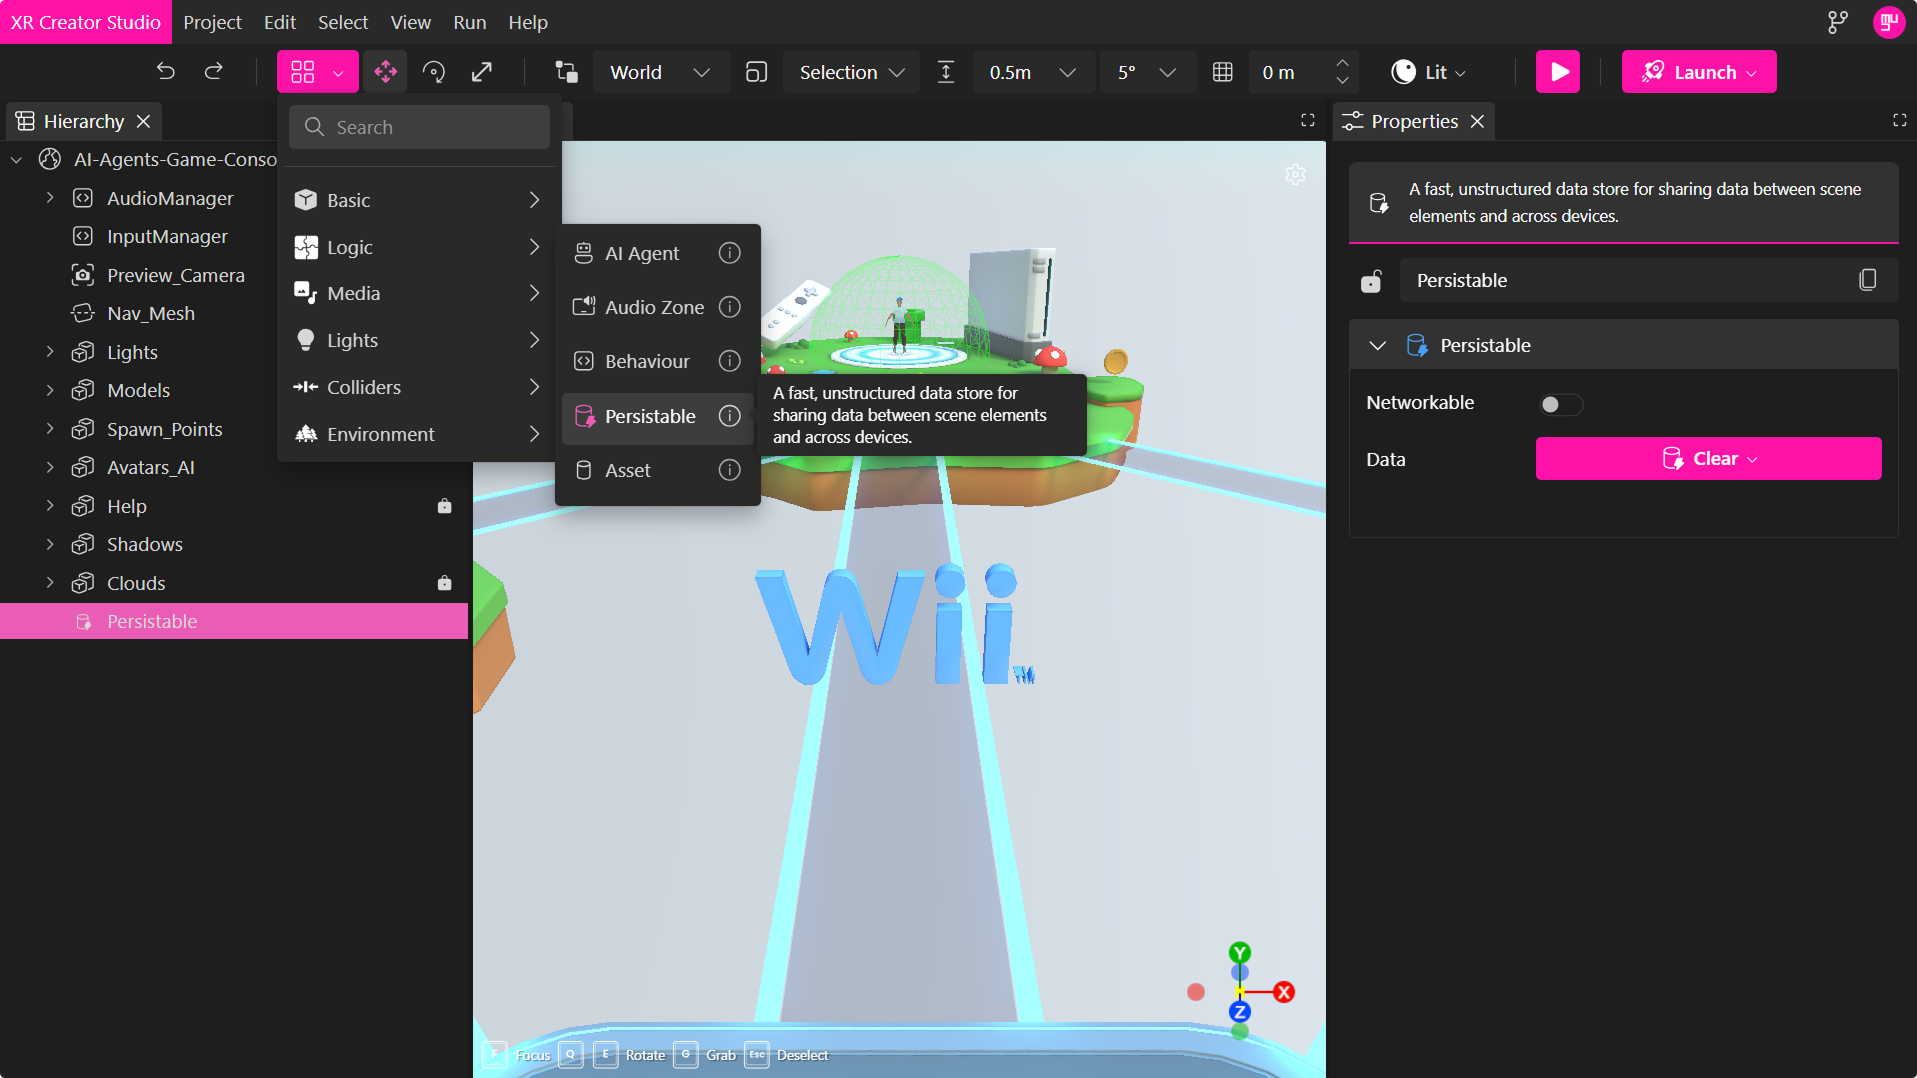
Next, in the agent's properties, choose the newly created persistable from the dropdown menu, then publish the verse.
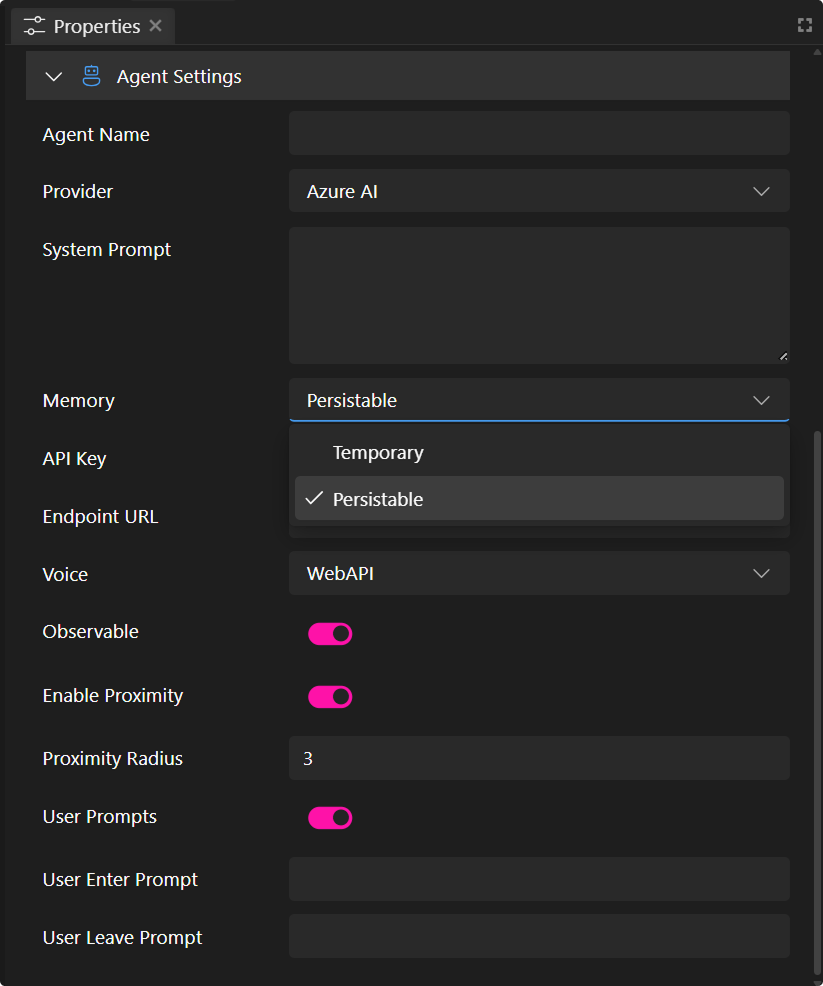
This ensures your agent maintains conversation context and memory across sessions.