OpenAI Assistants
Follow these steps to set up an assistant in OpenAI to power your AI agent in the metaverse. This approach allows you to upload files, enhancing your assistant's knowledge and contextual understanding.
1. Create an OpenAI Account
- Visit the OpenAI Signup Page and register an account.
2. Generate an OpenAI API Key
- Go to the OpenAI Dashboard.
- Navigate to the API Keys Section.
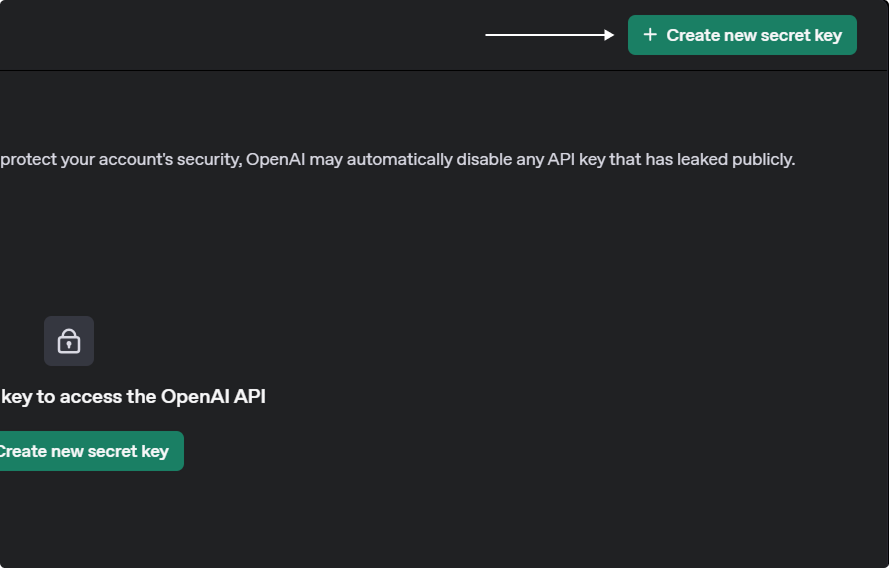
- Click Create new secret key.
- Provide a name tag, select a project, and set security permissions.
- Copy and store your API key safely, as it will not be shown again.
3. Create an Assistant
- Open the Assistant Page.
- Click Create to start a new assistant.

- Enter a name and provide system instructions (up to 256,000 characters).
- Upload necessary files for the assistant’s knowledge base.
- Enable the File Search tool for retrieving information.
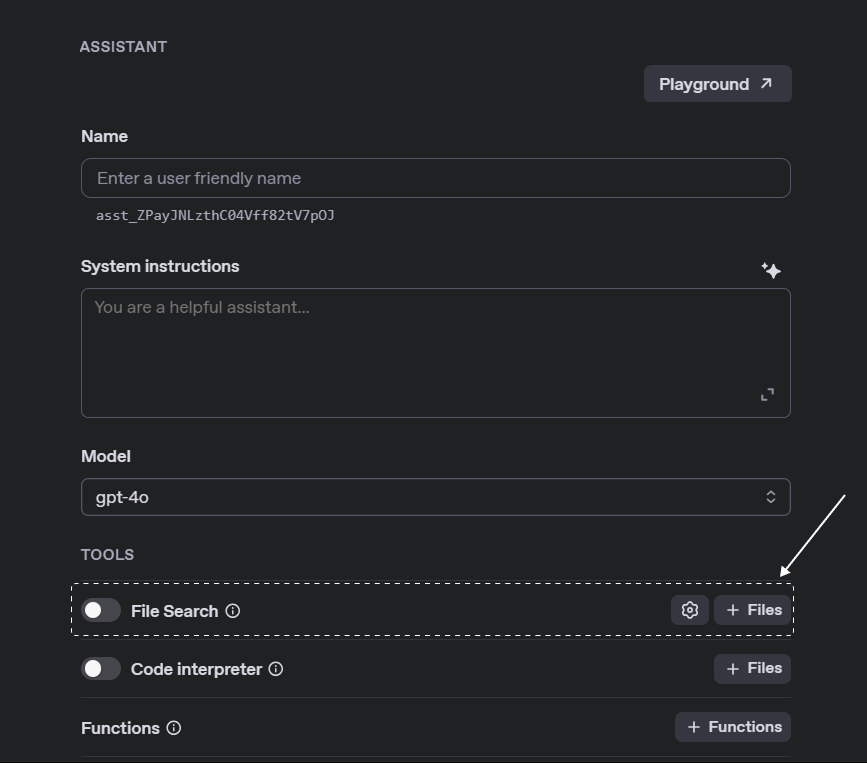
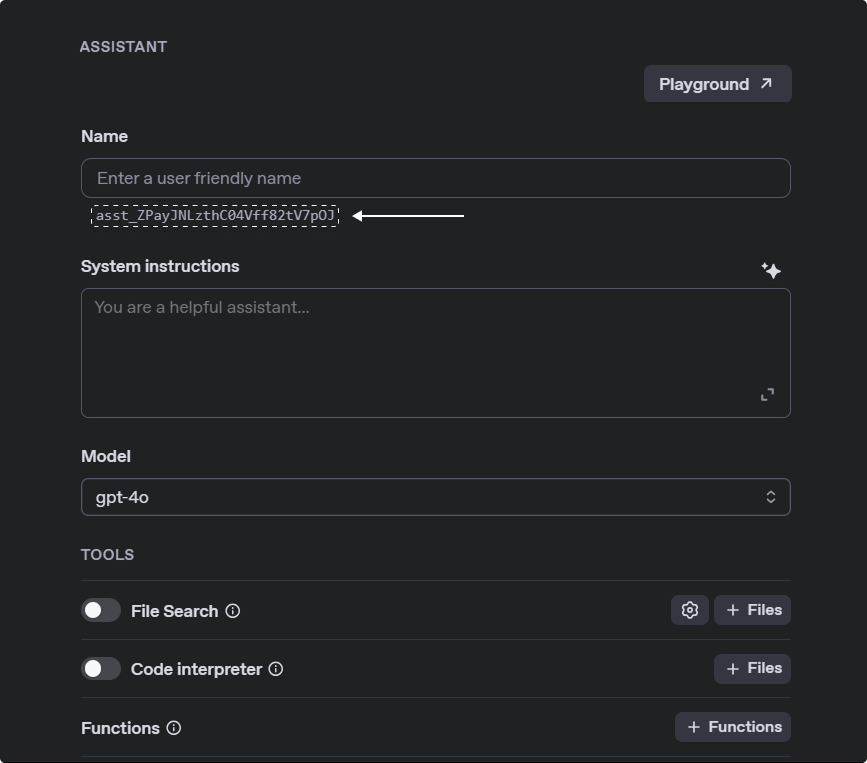
- Copy the Assistant ID for future use, you can find it below the name of your assistant.
Step 4: Integrate Your OpenAI Assistant with XR Creator Studio
Once you’ve set up an OpenAI assistant, you can integrate it into your XR project.
1. Create an AI Agent in XR Creator
- Open your project in the XR Editor.
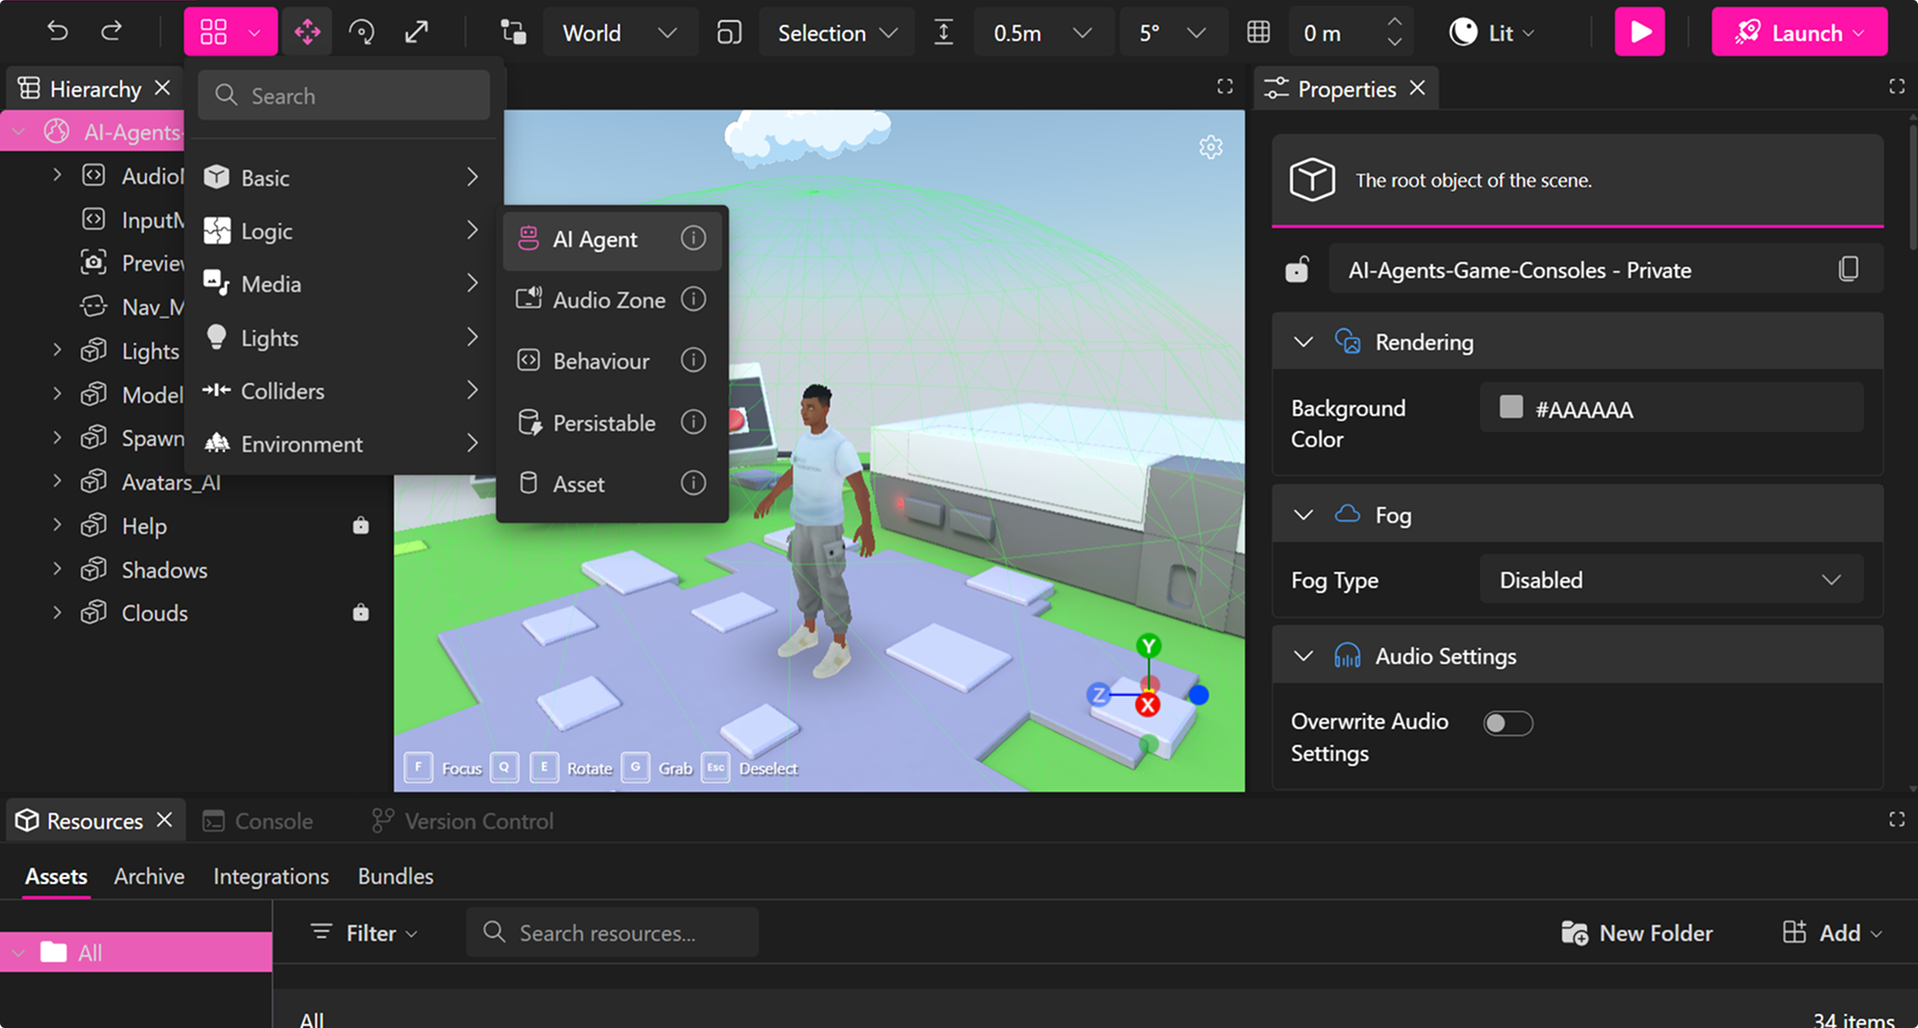
- In the Elements Menu, select AI Agent.
2. Configure AI Agent Properties
In the Properties Panel, you can set parameters to connect your assistant.
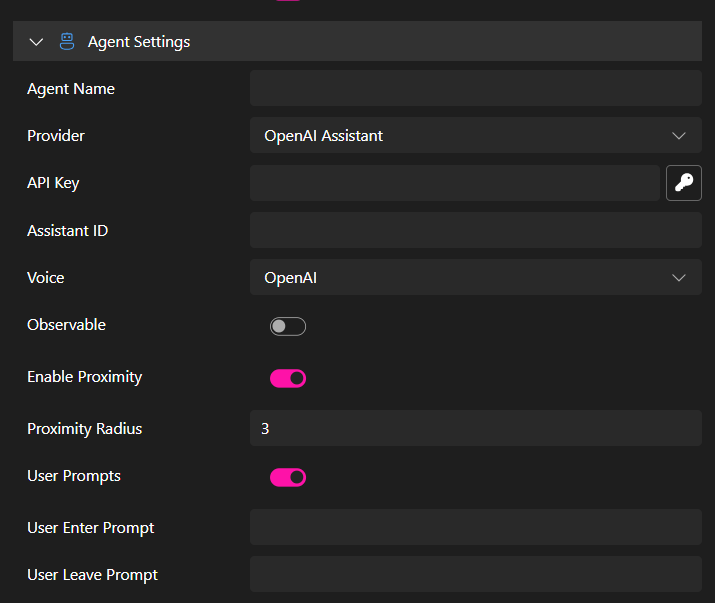
- Agent Name: This name will appear in the chat interface.
- Provider: Select the AI service. In this case, OpenAI Assitant.
- OpenAI API Key: Enter your secret API key securely.
- Assistant ID: This is the unique identifier (
asst_...) from OpenAI. Which you can find in the Assistant page. - Voice Options:
- OpenAI – Uses OpenAI’s voice generation.
- WebAPI – Uses browser-based text-to-speech (varies by browser).
- Silent – The agent will only communicate via text chat.
- Observable (Emit Events): Enable this option to trigger in-world scripting events. These are especially useful when working with our Scripting API. See more in the AI Agent Event System guide.
- Enable Proximity: The agent can detect when a user enters or exits a defined range.
- Proximity Radius: Sets the distance (in meters/units) around the agent where proximity events (like user-enter or user-leave) are triggered.
- User Prompts: Enable this to allow the agent to show custom messages when users enter or leave its proximity.
- User Enter Prompt: The message the agent will say or display when a user enters the defined proximity radius.
- User Leave Prompt: The message the agent will say or display when a user exits the proximity radius.
- User Prompts: Enable this to allow the agent to show custom messages when users enter or leave its proximity.
- Proximity Radius: Sets the distance (in meters/units) around the agent where proximity events (like user-enter or user-leave) are triggered.
Only the OpenAI API Key and the Assistant ID are not optional. Once your properties are set up, you can publish your project and have a fully functional Agent.